
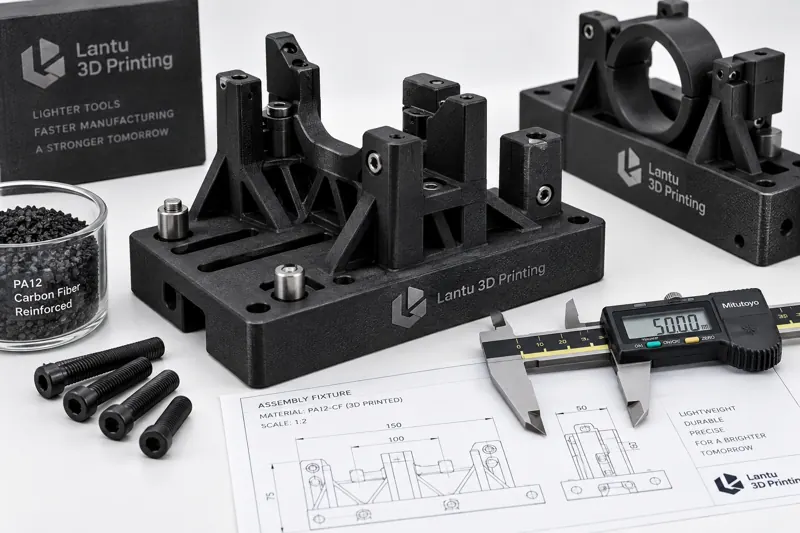
Introduction: The Real Reasons Fixtures Are Moving from Metal Machining to Additive Manufacturing
In automotive wire harness assembly, consumer electronics pilot runs, and small-batch medical device validation, fixtures typically handle positioning, limiting, inspection, and mistake-proofing functions. Traditional aluminum fixtures are strong, but a single part often takes 5 to 10 working days to machine. After a design change, they must be reprogrammed, re-clamped, and surface-finished again. For R&D teams that iterate every two weeks, fixture wait time often affects project pace more than the printed parts themselves.
The value of composite-material 3D printing is not simply that it is “cheaper,” but that it compresses fixture design, manufacturing, verification, and revision into a rapid engineering loop. Materials represented by PA12-CF, PA6-CF, and high-toughness photopolymer resins can achieve 30% to 60% weight reduction with the right design while still meeting the stiffness and wear requirements of standard assembly positioning. lantu3D focuses more on lifecycle management from blueprint to physical delivery, so it evaluates materials, structure, inspection, and follow-up maintenance as one integrated solution.
1. Material Selection: Define Load, Temperature, and Contact Method First
Fixture material selection should be driven backward from the use environment rather than simply ranked by price. If the fixture is mainly used for manual assembly at room temperature, SLS PA12 is usually sufficient, with a layer thickness of 0.10 to 0.15 mm and a slightly powdery surface but stable toughness. If the fixture must withstand screw preloading, pneumatic clamping, or repeated insertion and removal, carbon-fiber-reinforced nylon is more suitable, as its tensile modulus can be significantly higher than ordinary nylon and deformation control is better. If appearance, short-cycle validation, or complex details are required, engineering photopolymer resin can provide a finer surface, but long-term UV exposure and impact toughness must be considered.
Temperature is another critical boundary. Ordinary photopolymer resins may experience dimensional drift above 60°C, and nylon-based materials may also change dimensions by 0.2% to 0.6% after absorbing moisture. For welding-assist fixtures close to heat sources, priority should be given to heat-resistant resin, PA-CF, or metal insert solutions, and the design review should specify the maximum operating temperature, continuous exposure time, and cooling cycle. Material is not an isolated parameter; together with print orientation, wall thickness, and post-processing, it determines final stability.
2. Structural Design: Replace Monolithic Subtractive Thinking with Additive Thinking
Simply printing a conventional CNC fixture as-is usually does not produce the best result. 3D-printed fixtures should reduce large solid masses and instead use a combination of ribs, honeycomb structures, local thickening, and metal inserts. For handheld fixtures, shell wall thickness can be controlled at 2.0 to 3.0 mm, load-bearing hole areas can be locally thickened to more than 4.0 mm, and fillets should be added to avoid stress concentration caused by sharp corners. For datum surfaces that require repeated positioning, it is recommended to leave a machining allowance of 0.2 to 0.4 mm and then use milling or grinding later to obtain a more stable contact surface.
Threaded connections should not rely entirely on plastic self-tapping screws. For fixtures used more than 200 times in batches, heat-set brass inserts, steel bushings, or press-fit pin sleeves can be used. Positioning pin holes are recommended to be printed 0.1 to 0.2 mm undersized first and then reamed to ensure tolerance. This approach leverages printing for complex shapes while assigning high-wear, high-precision areas to mature standard components, making overall service life more controllable than a purely printed structure.
3. Process Window: Orientation, Layer Height, and Infill Determine Real Performance
The weak direction of a fixture often comes from interlayer bonding. FDM carbon-fiber nylon has better strength in the XY direction, but lower interlayer strength in the Z direction, so the build orientation must be adjusted when it bears peel loads. The SLS process has less anisotropy, making it suitable for complex fixtures and nested multi-part production, but hole accuracy and surface roughness require post-processing. Photopolymer printing offers fine detail, but support-contact areas and secondary curing conditions affect final dimensions.
Process parameters should be included in the fixture delivery documentation. For example, FDM PA-CF can use a layer height of 0.2 mm, 40% to 60% infill, and 4 to 6 outer walls, with key load-bearing surfaces arranged along the fiber deposition direction. SLS PA12 can use a 0.12 mm layer thickness, followed by depowdering, sandblasting, and dyeing after printing. Photopolymer resin fixtures should record secondary curing time, temperature, and support removal locations. Without parameter records, it is difficult to ensure consistency in future repeat orders.
4. Post-processing and Inspection: Turning “Usable” into “Deliverable”
Before delivery, fixtures should complete at least three types of checks. The first is dimensional inspection: use calipers, pin gauges, or coordinate measuring machine sampling to inspect locating holes, limiting edges, assembly datums, and fit clearances. The second is functional inspection: perform 20 to 50 consecutive trial assemblies with the real parts and observe wear, jamming, and positioning repeatability. The third is appearance and safety inspection: remove support residues, sharp edges, and powder to avoid scratching customer products or injuring operators.
For production-line fixtures, it is recommended to establish a simple service-life log: record the start date, shift usage, cumulative cycles, cleaning method, and any anomalies. When positioning deviation exceeds 0.2 mm or key contact surfaces show obvious wear, repair or reprinting should be evaluated. The advantage of 3D printing is that digital files are traceable, allowing weak structures to be quickly corrected back at the model level after fixture failure.
5. Cost and Business Value: Don't Compare Only Unit Prices
The unit price of composite printed fixtures is not always lower than that of simple aluminum parts, but the comprehensive value usually comes from delivery speed, revision cost, and inventory pressure. If a medium-sized assembly fixture takes 7 days to machine by CNC, printing plus post-processing can be compressed to 2 to 3 days. If three revisions are needed during the R&D stage, the printed approach only requires model adjustments and partial re-production, rather than repeating the entire machining preparation process.
For enterprise customers, a more reasonable evaluation method is “total project ownership cost.” This includes design communication, manufacturing cycle, trial-assembly failure risk, spare-part inventory, maintenance records, and the reuse ratio of the next product generation. In projects, lantu3D manages fixtures as R&D assets rather than disposable consumables, helping customers strike a balance between rapid iteration and stable delivery.
Conclusion
The success of high-performance composite-material 3D-printed fixtures does not depend on whether one material is “the strongest,” but on whether the load boundary, structural design, process parameters, and inspection standards form a closed loop. Through local reinforcement, standard-part inserts, post-machining of key surfaces, and service-life tracking, printed fixtures can provide reliable, lightweight, and rapidly iteratable solutions for prototype production and small-batch manufacturing.
Submit a model, drawing, image or written notes. Engineers will review material, process, finishing and delivery based on actual use.