
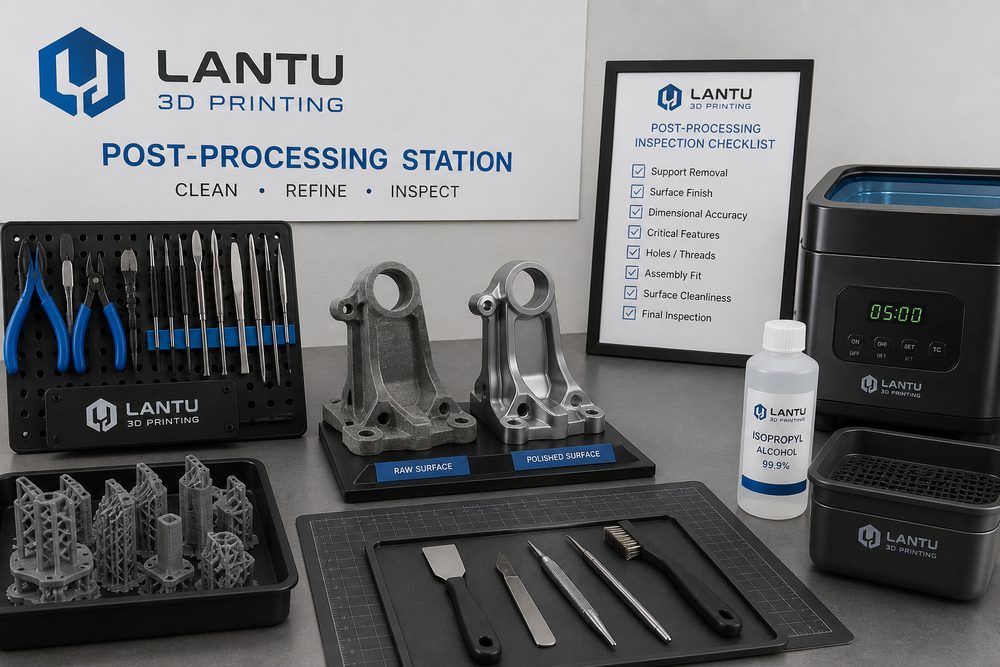
Introduction: Post-processing Determines Whether a Part Is Truly Deliverable
When many companies evaluate 3D printing, they focus on machine accuracy, material unit cost, and print time, while underestimating the impact of post-processing on final quality. A part taken from the printer is usually only “formed,” not necessarily “ready to assemble, ready to display, or ready to deliver.” Support marks, trapped powder, incompletely cured resin, inconsistent surface roughness, whitening at edges, and blocked holes can all cause a seemingly successful print to fail during customer acceptance or engineering assembly.
lantu3D treats post-processing as part of the lifecycle from blueprint and design to manufacturing and physical delivery, not as a simple finishing step. Especially for small-batch parts, display models, functional prototypes, and tooling projects, clearly defined post-processing standards directly affect cost, lead time, and rework rates.
1. Support Removal: Protect Critical Surfaces First, Then Pursue Efficiency
FDM, SLA, DLP, and metal SLM processes often require support structures. Support removal may seem to rely on manual experience, but in fact the contact areas of supports should be anticipated during the design stage. For appearance surfaces, sealing surfaces, assembly datum surfaces, and areas around threaded holes, support contact should be minimized. If necessary, the orientation should be adjusted or the part should be split for printing. For photopolymer resin parts, overly thick support points can leave pits, while overly thin supports may cause print failure. A common strategy is to place main supports on non-visible surfaces and use fine supports at edges or transition areas to reduce sanding work.
The key goal of support removal is not to be “as fast as possible,” but to avoid secondary damage. Thin-walled structures, snap-fit features, and long slender ribs should first be released in segments with side cutters to relieve stress, then locally trimmed. For metal parts, the heat-affected zone, remaining stubs, and localized hardening after support cutting must also be included in the subsequent machining or sanding plan.
2. Washing, Curing, and Powder Removal: Material Properties Define the Processing Window
SLA/DLP resin parts usually require alcohol washing and secondary UV curing. Insufficient washing can leave the surface tacky, while excessive washing may cause embrittlement or whitening of fine details. Curing time must also be adjusted according to the material, wall thickness, and transparency. SLS nylon parts focus on powder removal and internal cavity cleaning. Complex channels, blind holes, and lattice structures may require compressed air, brushes, vibration, or ultrasonic assistance. If powder remains in internal cavities for too long, it can affect assembly, weight, and subsequent coating adhesion.
When evaluating models, lantu3D calculates the material process together with the post-processing window. For example, for the same appearance prototype, resin is suitable for showing fine details, but large thin panels may require reinforcement and segmentation; nylon is suitable for impact-resistant structural parts, but if the customer requires a high-gloss appearance, additional sanding, primer, and painting steps will be needed.
3. Surface Finishing: Consistent Roughness Matters More Than Local Shine
Common post-processing methods include sandblasting, tumbling, sanding, polishing, dyeing, spray painting, electroplating, and clear coating. A common misunderstanding in delivery is to pursue one area being “very shiny” while ignoring overall consistency. For display models, customers usually care more about color variation, seams, edge lines, and tactile feel; for functional parts, over-sanding may change fit dimensions or even weaken thin-wall strength.
Therefore, acceptance criteria should be clearly defined before post-processing: appearance grade, allowable layer lines, visible support mark locations, color range, coating thickness, and protected critical dimensions. For mounting holes, sliding slots, snap fits, and locating surfaces, masking or compensation should be reserved before painting. Batch projects should also create a first-article sample, with subsequent parts compared against that sample to reduce variation between operators.
4. Dimensional Re-Inspection: Dimensions After Post-Processing Are the Delivery Dimensions
Passing dimensional inspection after printing does not mean the part will still pass after post-processing. Sanding can reduce wall thickness, paint can add surface thickness, and heat curing or oven drying may introduce slight deformation. For parts with assembly requirements, a three-stage process is recommended: “initial inspection after printing — protection during post-processing — final re-inspection.” Common inspection tools include calipers, plug gauges, pin gauges, thread gauges, and coordinate measuring machines; for complex curved surfaces, scanning and comparison can be used to confirm overall deviation.
When project risk is high, lantu3D recommends that customers manage appearance surfaces and functional surfaces in separate classes: appearance surfaces focus on texture and color, while functional surfaces focus on hole spacing, flatness, perpendicularity, and fit clearance. This avoids sacrificing assembly performance in pursuit of appearance.
5. Bring Post-Processing Forward into Quotation and Design
Post-processing is not a free add-on. For a part with high surface requirements, many masked areas, complex colors, and multiple inspection steps, labor cost may exceed printing cost. Transparent quotations should break down support handling, washing and curing, sandblasting and sanding, painting and dyeing, inspection, and packaging so customers understand that the cost comes from real operations rather than vague markups.
A better approach is to reduce post-processing difficulty during the design stage: keep appearance surfaces away from support surfaces, add process tabs for easier clamping, split deep-cavity structures that are difficult to process, and clearly define which surfaces must not be sanded. This shortens lead time and improves stability at the same time.
Conclusion
The goal of 3D printing post-processing is not to hide printing defects, but to turn a formed part into a deliverable that can be used, displayed, and accepted. Only by bringing support removal, washing and curing, surface consistency, dimensional re-inspection, and acceptance criteria into full-process management can 3D printing services evolve from one-off prototyping into a reliable on-demand manufacturing capability.
Submit a model, drawing, image or written notes. Engineers will review material, process, finishing and delivery based on actual use.