
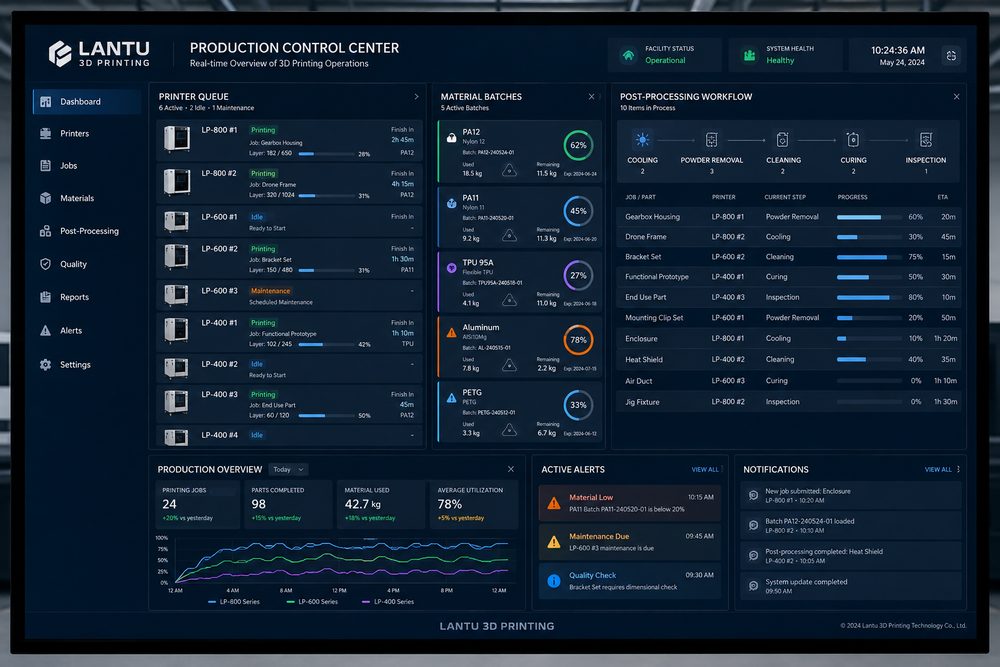
Introduction: Lead Time Is the Result of Multiple Coordinated Steps
In 3D printing services, customers often think of lead time as the machine’s print time. In reality, the full delivery cycle also includes file review, quotation approval, material preparation, nesting and slicing, printing, cooling or curing, depowdering or support removal, surface finishing, dimensional inspection, packaging, and shipping. If any one step is poorly scheduled, a print job that could have been completed in 24 hours can easily turn into a three- to five-day wait. lantu3D, as a platform that supports the full journey from design files to physical delivery, focuses on coordination among equipment, materials, post-processing, and quality control rather than machine speed alone.
1. Identify the Real Bottlenecks Before Adding More Equipment
The first step in production scheduling is to measure the workload of each process. FDM and SLA orders are often constrained by print time, while SLS nylon jobs may be limited by cooling, depowdering, and dyeing batches. Metal printing can also be delayed by heat treatment, wire cutting, and surface finishing queues. It is recommended to break each order into standard labor and machine times: file review, 0.5-2 hours; slicing and nesting, 0.5 hour; printing, 4-36 hours; cooling or curing, 2-12 hours; post-processing, 1-24 hours; and final inspection, 0.5-2 hours. Only by seeing the true time structure can you determine whether the bottleneck is equipment, labor, or outsourced processes.
2. Batch by Material and Process to Improve Equipment Utilization
3D printing removes the need for molds, but that does not mean every order should run separately. SLS PA12, MJF nylon, and resin production parts are best batched by material, color, layer thickness, and due date. When batching, set a delivery cutoff window. For example, only combine orders confirmed within the next 24 hours for the same powder batch, so you do not sacrifice delivery speed just to wait for more parts. For resin parts, pay attention to vat changes and cleaning time. Transparent resin, high-temperature resin, and tough resin should not be mixed too frequently, or contamination and rework risk will increase.
3. Build Dynamic Priorities to Control the Cost of Rush Orders
Rush orders are one of the most common disruptions in production scheduling. It is better to rank orders by five dimensions—promised due date, customer tier, process risk, post-processing complexity, and logistics timing—rather than simply by who is pushing hardest. Before accepting a rush order, assess the impact: Will it interrupt the current batch? Will it waste material? Will it crowd out post-processing capacity? Will it affect already promised jobs? For projects that truly require a rush, record the reason and the orders affected, and update the new estimated completion time on the dashboard. A transparent change process protects delivery stability better than last-minute verbal adjustments.
4. Schedule Post-Processing and Inspection in Advance
Many delays happen after printing is finished. Resin parts need washing, secondary curing, support removal, sanding, and spraying. Nylon parts need cooling, removal from the build chamber, depowdering, sandblasting, dyeing, and drying. Metal parts may require heat treatment, support removal, machining, and surface finishing. If these steps are only queued after printing is complete, they quickly become a new bottleneck. A better approach is to generate the post-processing work order at the same time as slicing and nesting, and reserve labor and equipment windows in advance. For critical jobs, the post-processing station should be notified two hours before printing ends so fixtures, consumables, and inspection tools are ready.
5. Use Data to Review Delivery Variance and Continuously Refine Scheduling Rules
Every week, review the gap between planned completion time and actual completion time, and analyze whether the cause was repeated file revisions, equipment failure, material shortages, post-processing rework, inspection delays, or shipping delays. It is a good idea to track on-time delivery rate, equipment utilization, average queue time, rework rate, and the share of rush orders. If equipment utilization is low but deliveries are still late, the bottleneck is likely front-end review or post-processing. If the rework rate is above 5%, the process should return to design review and parameter control. The scheduling system should adjust safety buffers based on data, not on intuition alone.
Conclusion: Good Scheduling Makes Delivery Predictable
The goal of 3D printing production scheduling is not to keep every machine fully booked. It is to create a stable rhythm across materials, equipment, labor, post-processing, and quality inspection. By identifying bottlenecks, batching by material, setting dynamic priorities, scheduling post-processing early, and reviewing data regularly, companies can reduce waiting and the chaos caused by rush orders, while giving customers more accurate delivery commitments and more reliable physical outputs.
Submit a model, drawing, image or written notes. Engineers will review material, process, finishing and delivery based on actual use.